
My latest homemade project here at Bee HQ is a compost bin. When I googled “compost bin made from recycled wooden pallets” there were 1.7m suggestions, so you might ask, why add one more? Well, I hope you will find this simple and clear.
I have an 8-9 step guide below, and, in case you worry it is difficult and time-consuming, I found it surprisingly easy to make, bearing in mind I am a very amateurish DIY-er. How wrong could it go?
First up, find yourself a kindly local company willing to let you have the pallets. You need four, roughly the same size and shape. Some pallets (which tend to be painted bright red or blue) are not to be recycled; they belong to the company who own them, CHEP, who are very clear on the subject:
CHEP equipment cannot legally be bought, modified, exchanged for non-CHEP equipment, sold, or otherwise disposed of. Unauthorised appropriation, use or disposal of CHEP equipment is strictly prohibited.
However, there are many other pallets around, and I have never been turned away when I have asked for them from companies where I am a customer (thanks Hillier Garden Centre, Wickes and Topps Tiles). Indeed, they seemed happy for me to have them, especially when I explained why I wanted them. Obviously you need to be able to transport them (they fit in the back of our trusty Volvo with the seats down) and, while rather unwieldy, are not too heavy.
I did read a handful of the million or so internet articles and forums, and was slightly concerned that some of the pallets are stamped MB which means they have been treated with methyl bromide, which is a pesticide. One article said to avoid using them if you are going to be then putting the compost you make onto crops (which I won’t). All the other articles I read (The Telegraph, Guardian and Gardeners World) didn’t mention it at all. In the end I made an executive decision to not worry about it. Also, sorting through the pallets searching for the stamps (many not easily visible) made me look pretty damn fussy. I reckon life is a little too short and delaying making the compost bin (and therefore the compost – which is a fairly long process anyway) seemed a bit silly and counter-productive. More to the point, I just wanted to get on with it. Patience is not my middle name….
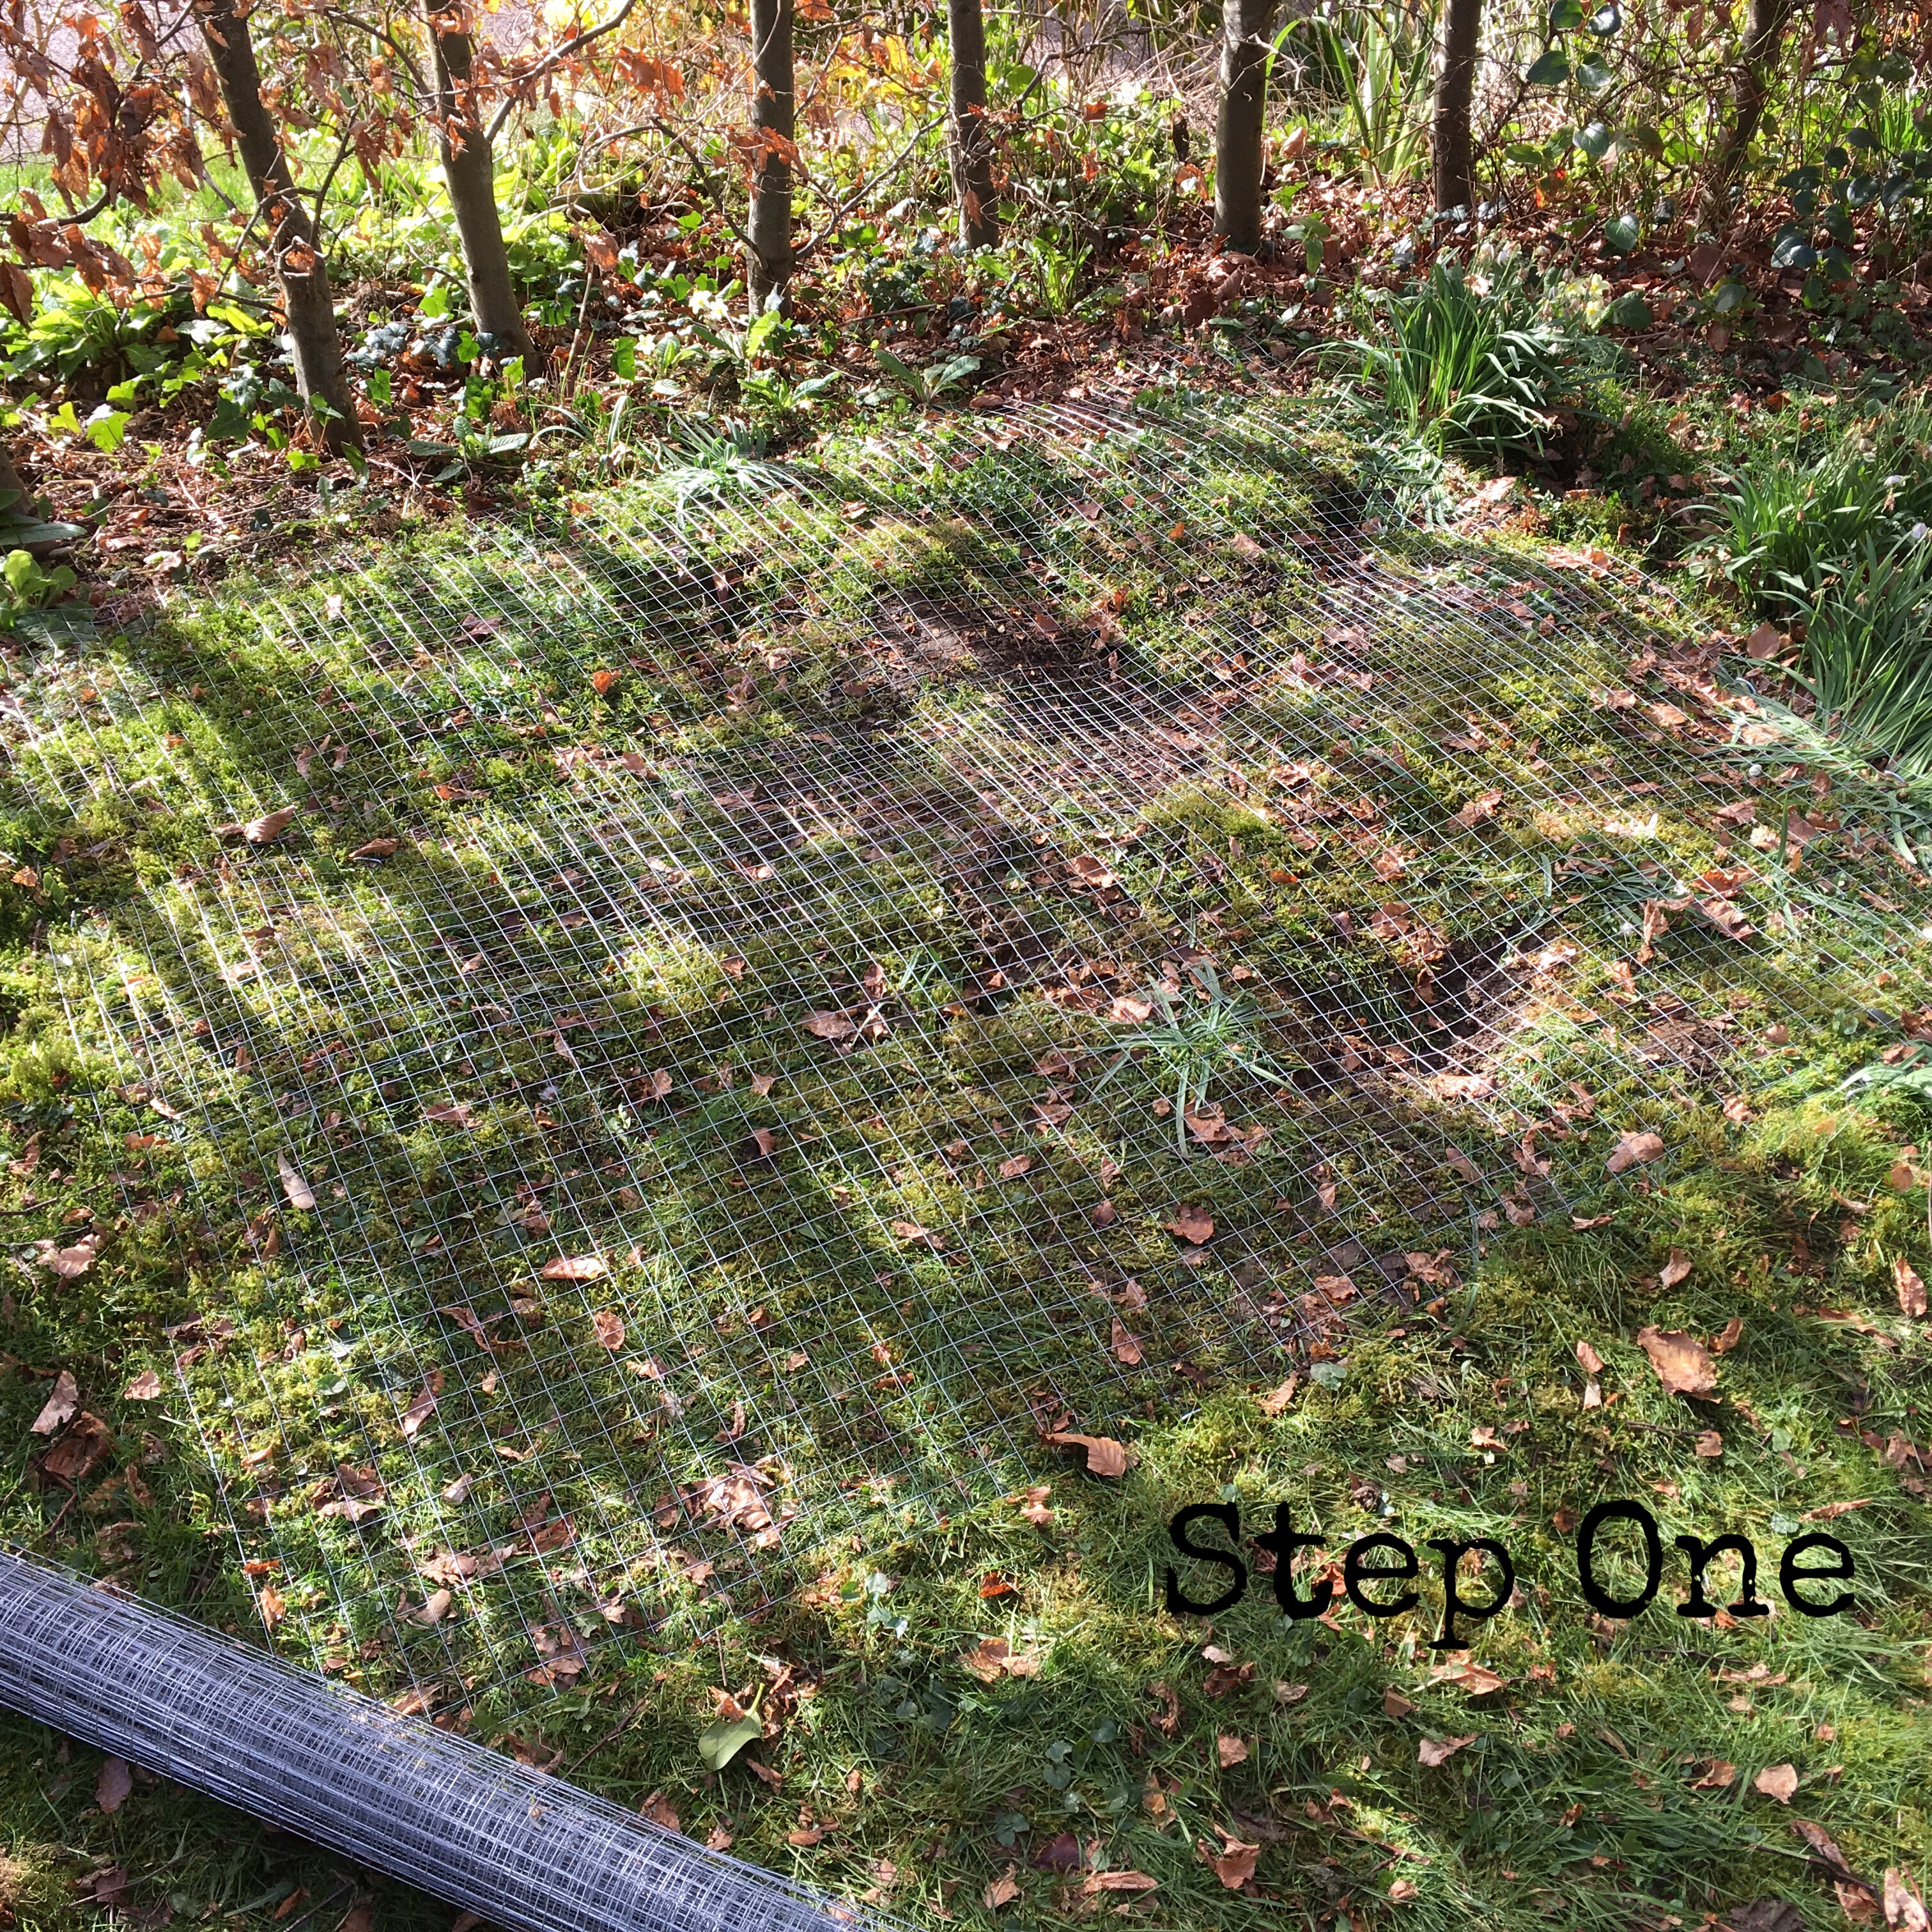
Four pallets later, I started the project by getting some chicken wire from the shed and pegged it out onto the area I had chosen for the compost bin. This is to prevent vermin from burrowing and tunneling into the compost from the bottom.
Next step is to get the first two, then three, pallets roughly into the right place and tie them together with some wire once you are happy they are about right.


Stand back. Admire. Have a cup of tea.

At this point our one-year-old Maine Coon, Huck, decided I needed some ‘help’.

Get a saw and cut the fourth pallet in half.

Get a drill, some screws, a hammer and some nails and secure the entire structure together.

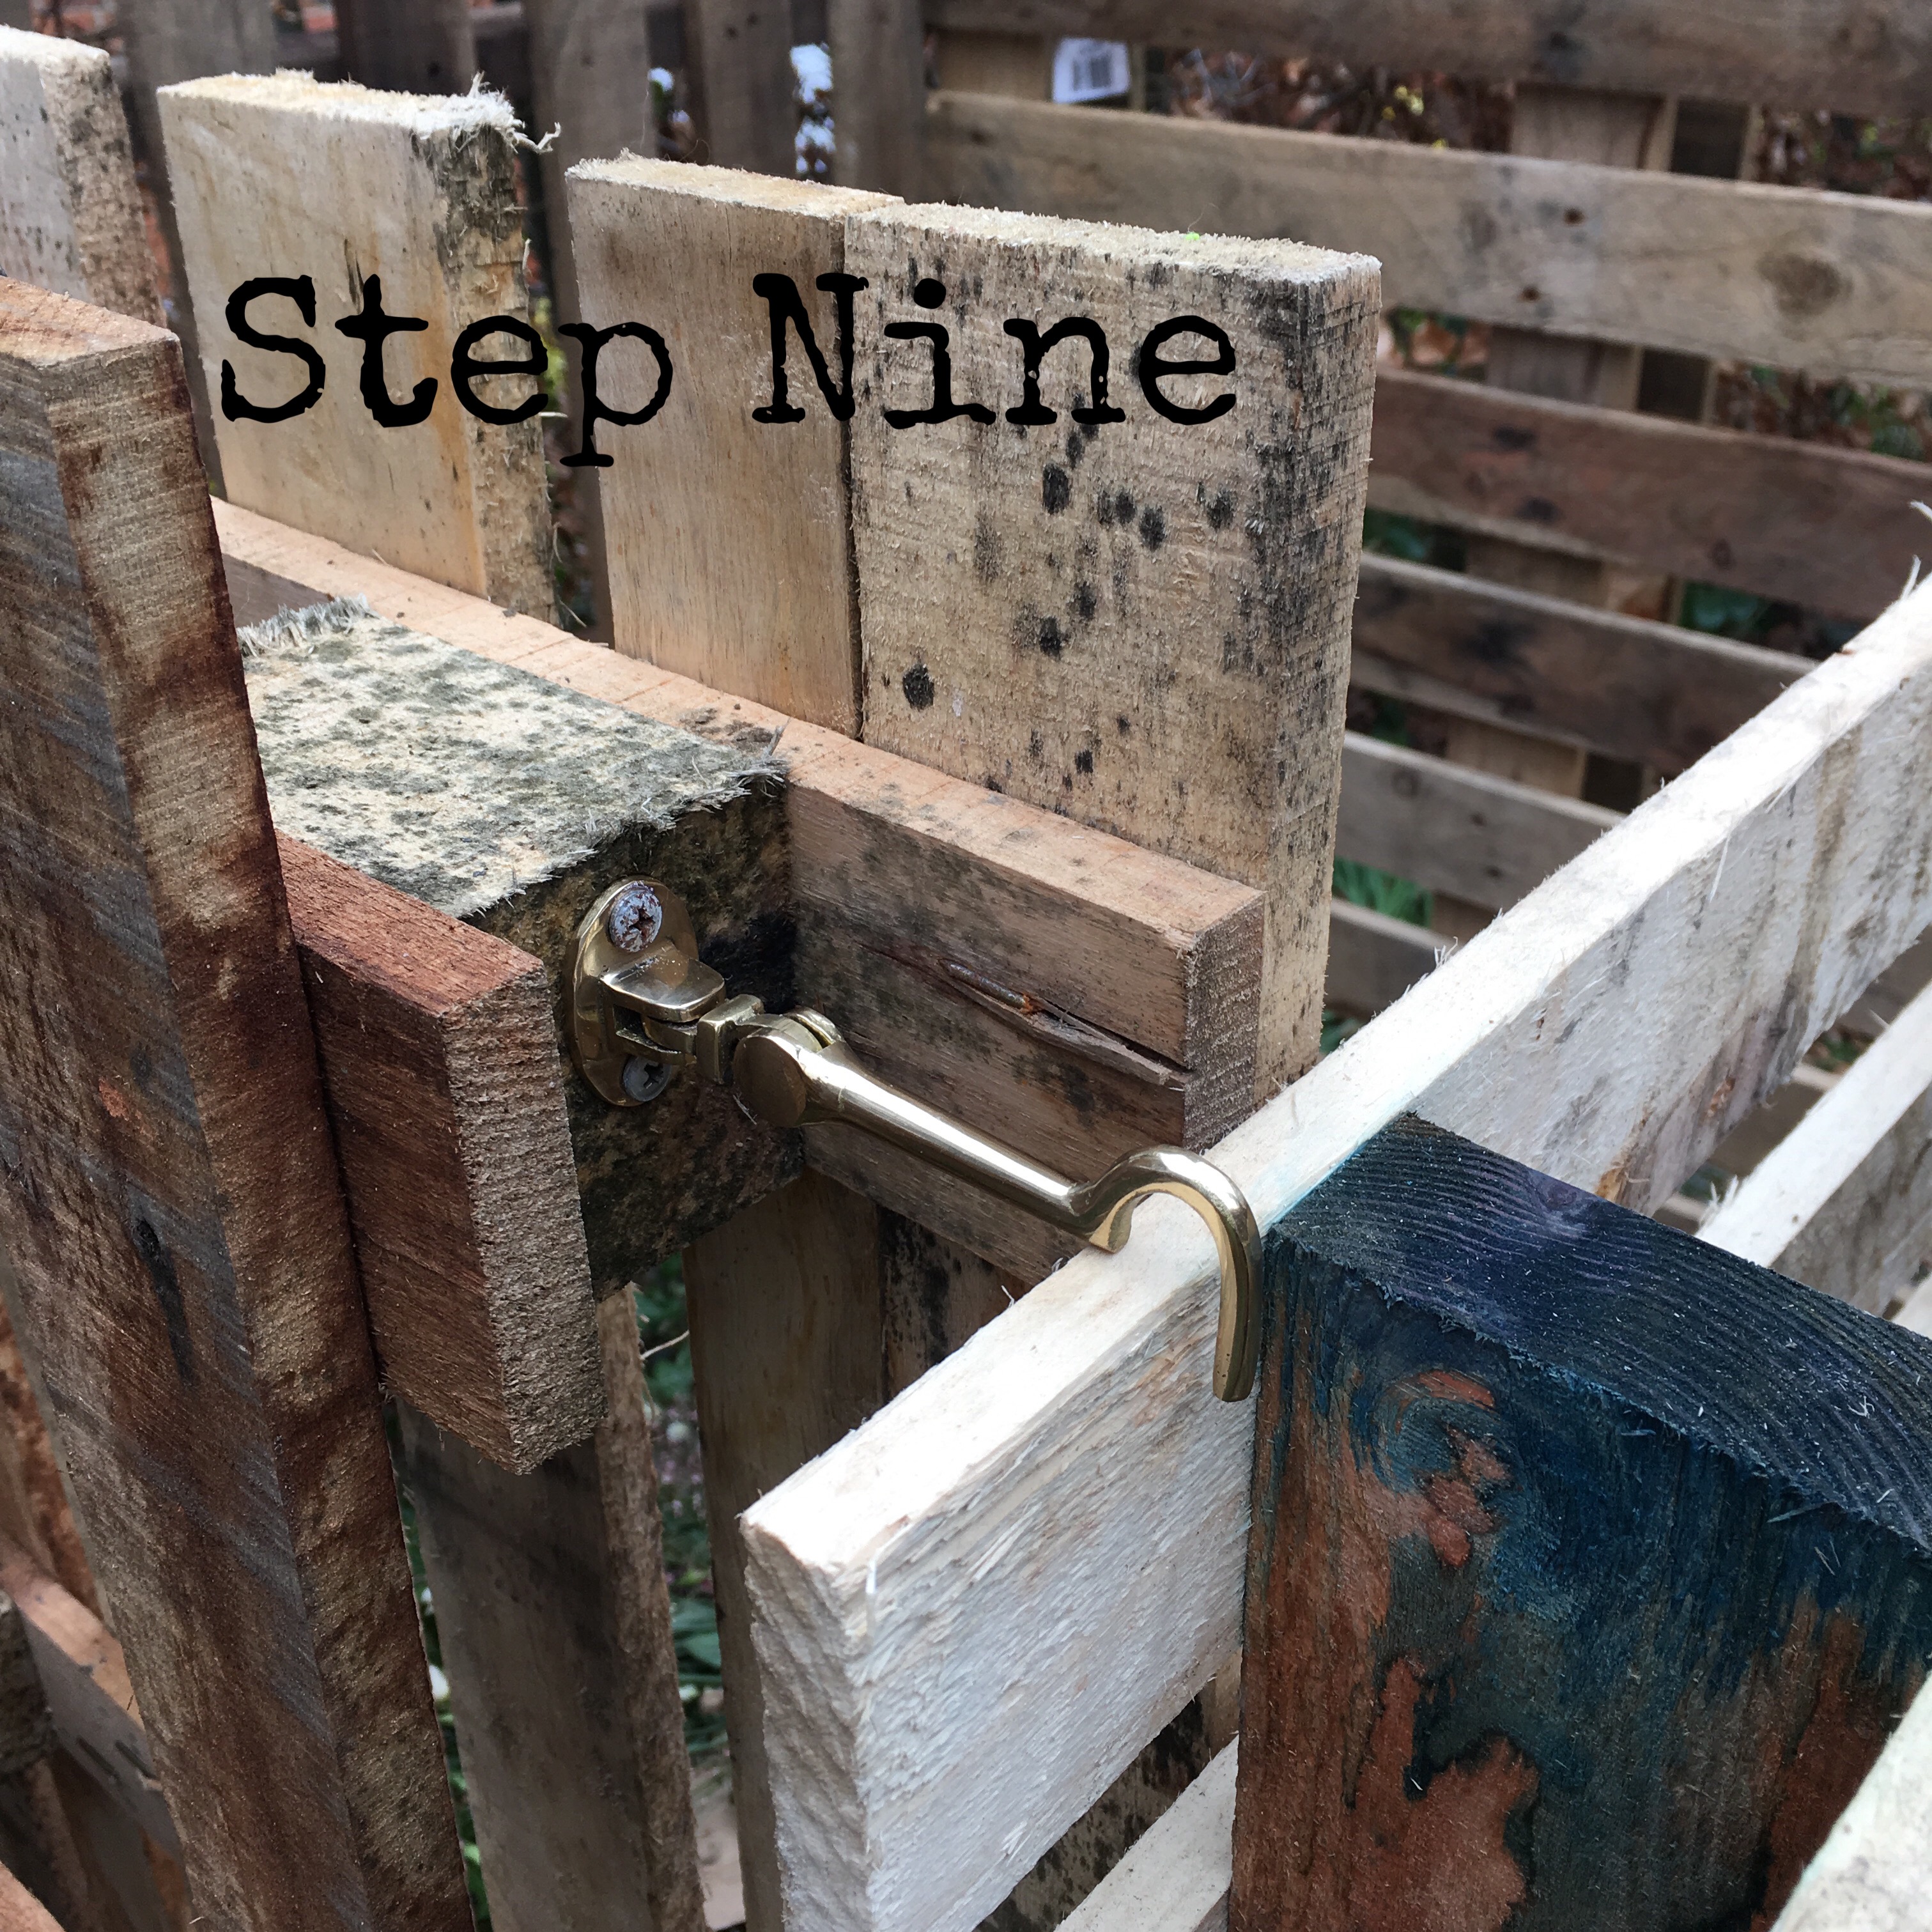
This is the only part where another pair of hands is welcome, and I luckily had my nephew staying who was able and willing. You want this bit of the compost bin to open so you can fork your waste in from the wheelbarrow. You could have the entire fourth pallet opening in this way of course. Initially I used some small hinges, but realised the weight of the ‘gate’ required more substantial ironmongery.
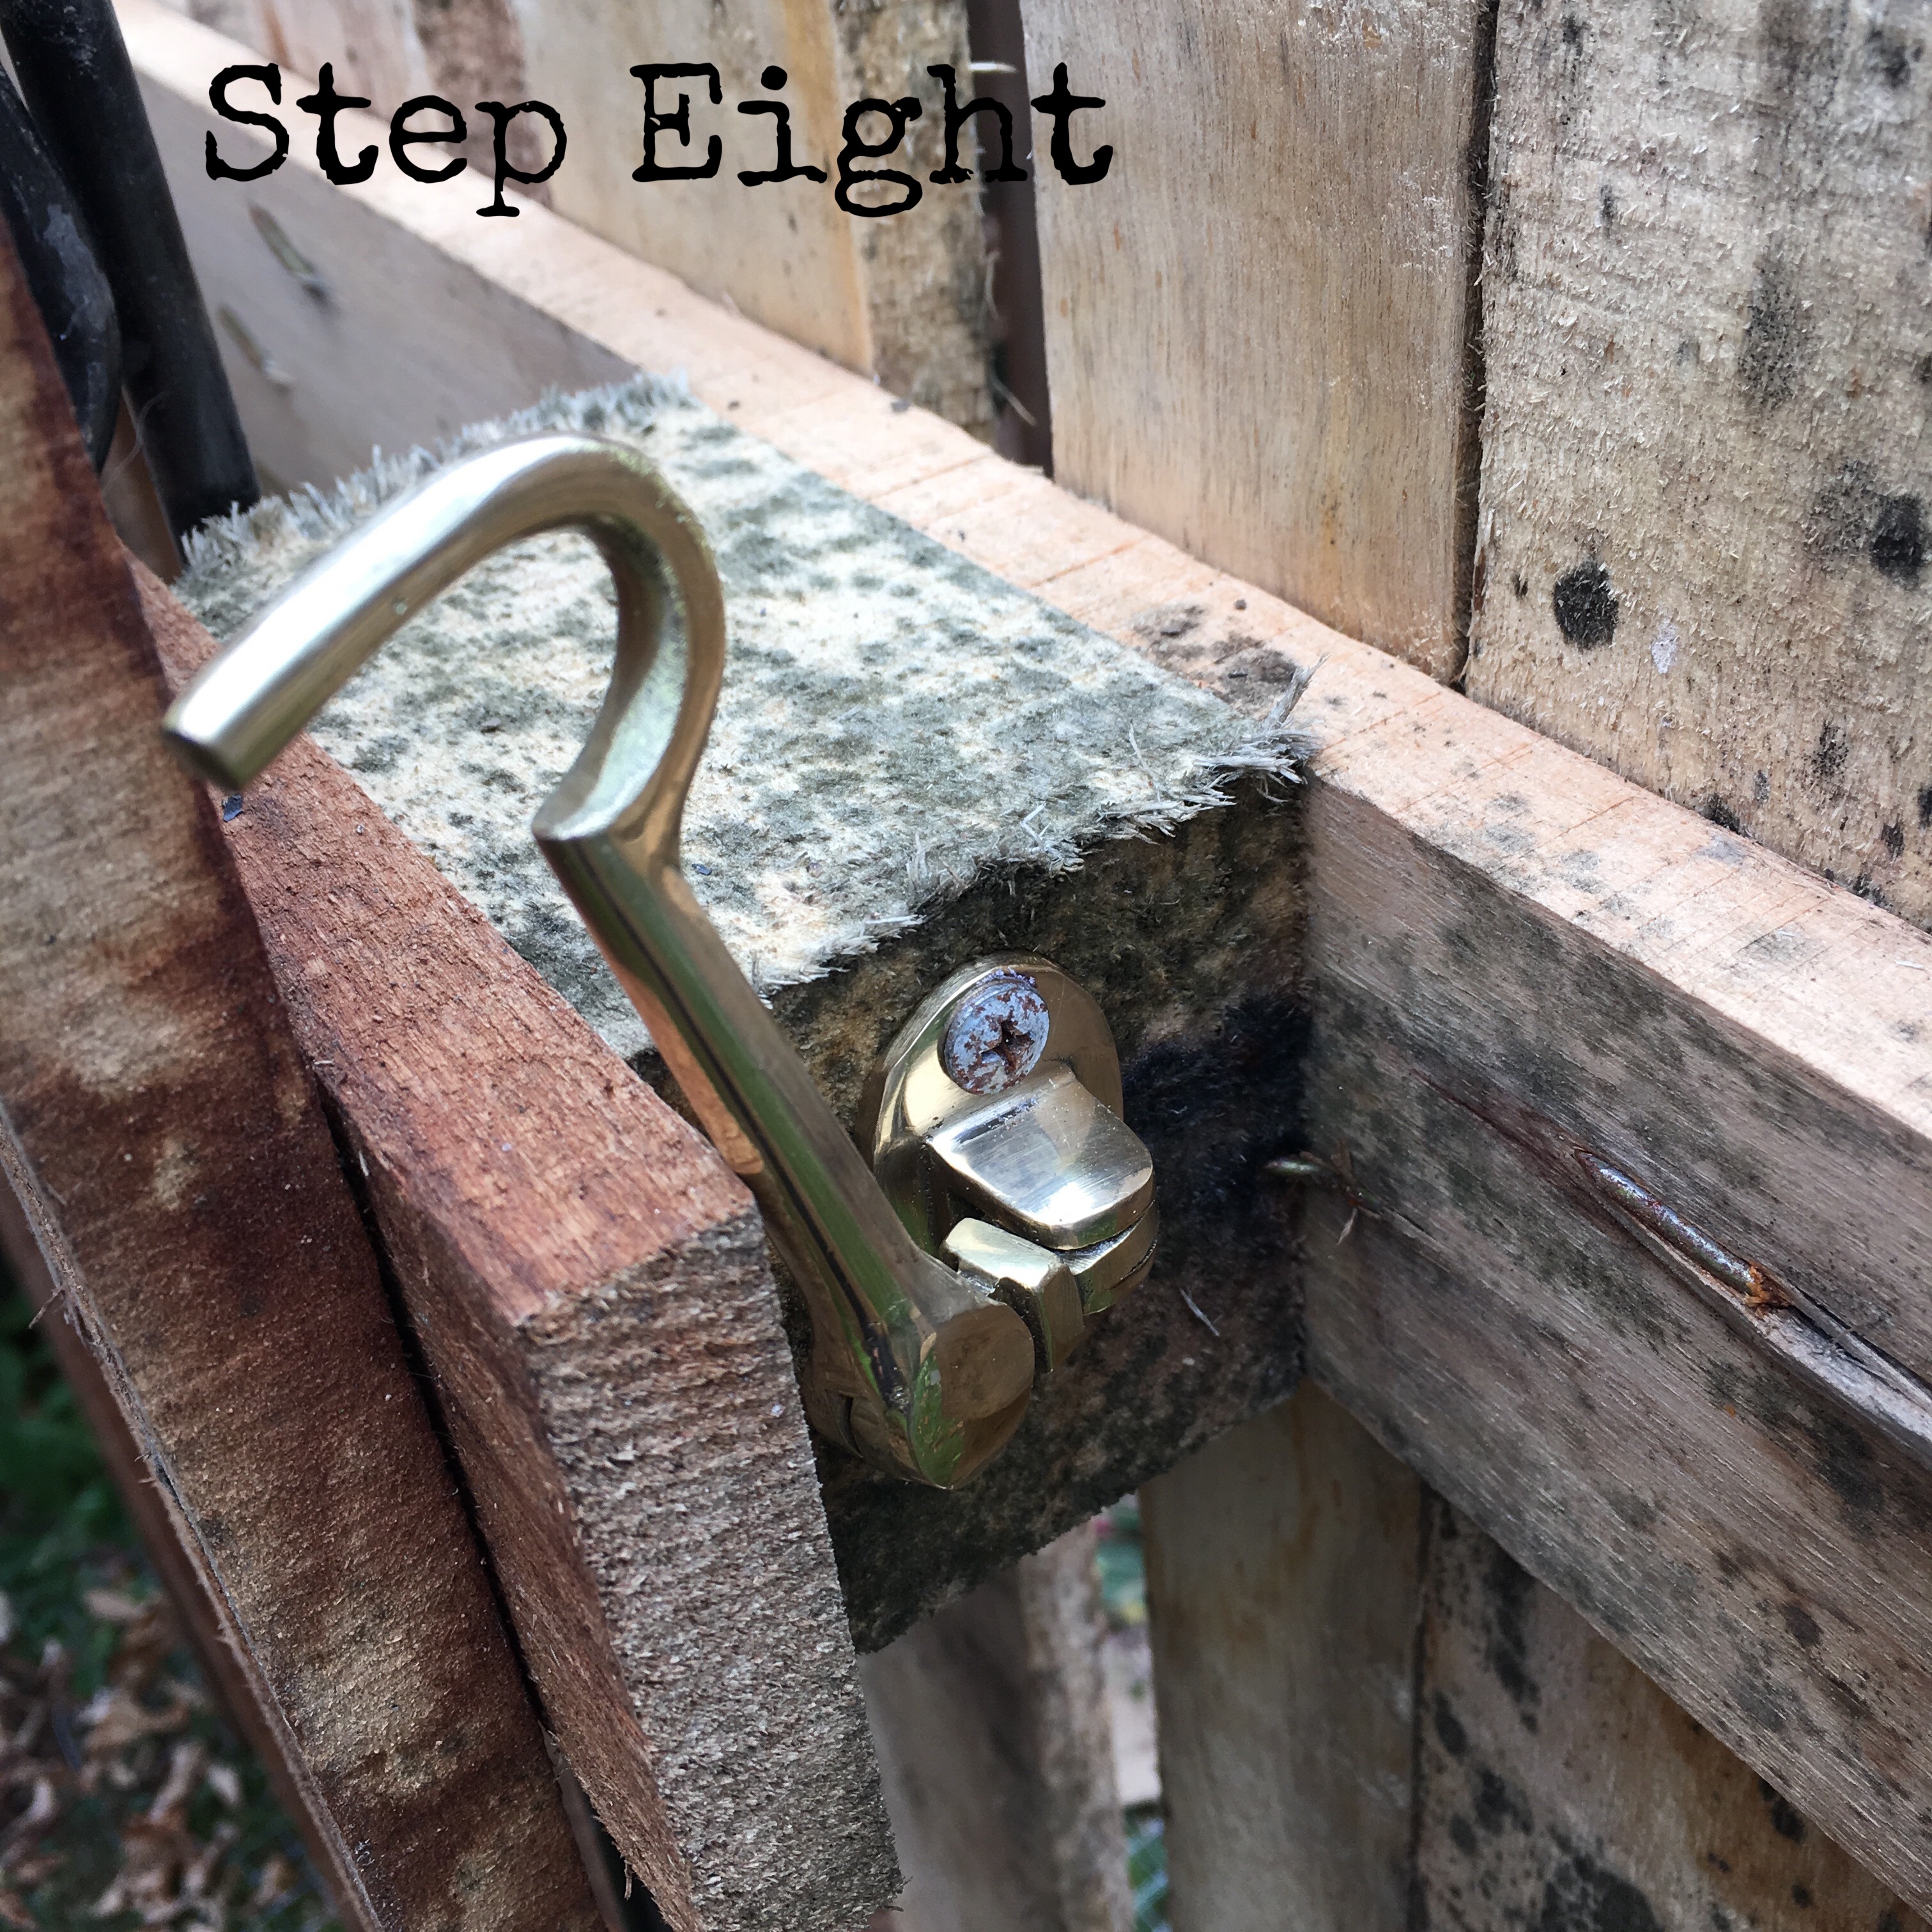
An alternative to a hook would be some farmer’s twine but this looks elegant ….. for a recycled compost bin.
All done. Now the far more difficult business of making good compost begins. And more to the point, one compost bay in isolation is not ideal, so I will need to add at least one other pallet-structure to this first one. However, I can wait for a few months before I need to go scouting for more pallets. This is what I will be aiming for:

Overall cost? Under ten pounds for the hinges, screws and chicken-wire.
Cheap. Cheerful. Recycled. Fun.
What’s not to like?
Annie Bee x

