
While I am not (yet) at the stage in life where I feel the need to host a “crafternoon”, I do enjoy making things. A few years ago I started adding items like, ‘drill’, ‘electric saw’, ‘hedge trimmer’, and ‘axe’ to my birthday and christmas lists. A few of these have been ignored; I think Mr Bee is worried about me with an axe – partly for the sake of the trees and perhaps a little by the thought of me chopping off a foot. And he might have a point. My eldest son earns his living from his hands and has been a great encouragement to me, happily explaining how to wield the drill and helping (well, heading-up) various large projects: an outdoor tortoise enclosure as well as the concrete base for the greenhouse being the most onerous. My BF is also very good with a drill, and fixes things which many of us would happily take to the rubbish dump. I am still reeling from the sight of her taking apart the engine of a lawn mower many summers ago. Anyway, I enjoy making.
This autumn, in light of my empty nest and also because I find TVs rather ugly to look at in a room, I decided to build a folding screen to stand in front of the telly in what we still call the ‘playroom’ – this room has been the natural habitat of the kids since we moved in 15 years ago. In that time it has grown up at roughly the same rate as the Bees, and is now looking a bit more adult in nature (cheerio beanbags, boxes of toys and Disney dvds). The end of the room where they gravitate to is the tech-end, where they can veg out in front of the TV, DVD player and PS4. I would hate to count the proportion of their lives spent relaxing in this corner, but they seem to have turned out well so I mustn’t complain. Now the Bees have flown the nest, I wanted to hide this unattractive, black tech area and decided that the best solution would be a folding screen; that way, when the Bees return during the holidays, they can remove the screen and once again go into an intellectual coma in their favourite spot.
I could have bought a screen but making one appealed and I thought I would share the process with you here.
Firstly I did some homework: I watched a few youtube lessons, read up on some websites, found some pictures of screens I liked (have a look at my pinterest board here) and made a list of what I needed to buy. I roughly measured (and I will come to this later) the space I wanted to screen, and then added a bit, due to the nature of the screens being angled. I debated long and hard whether to keep the tops of the panels straight or use a jig-saw to make them rounded. In the end, given what I decided to cover the screens in, I went for straight and simple.
My list was as follows:
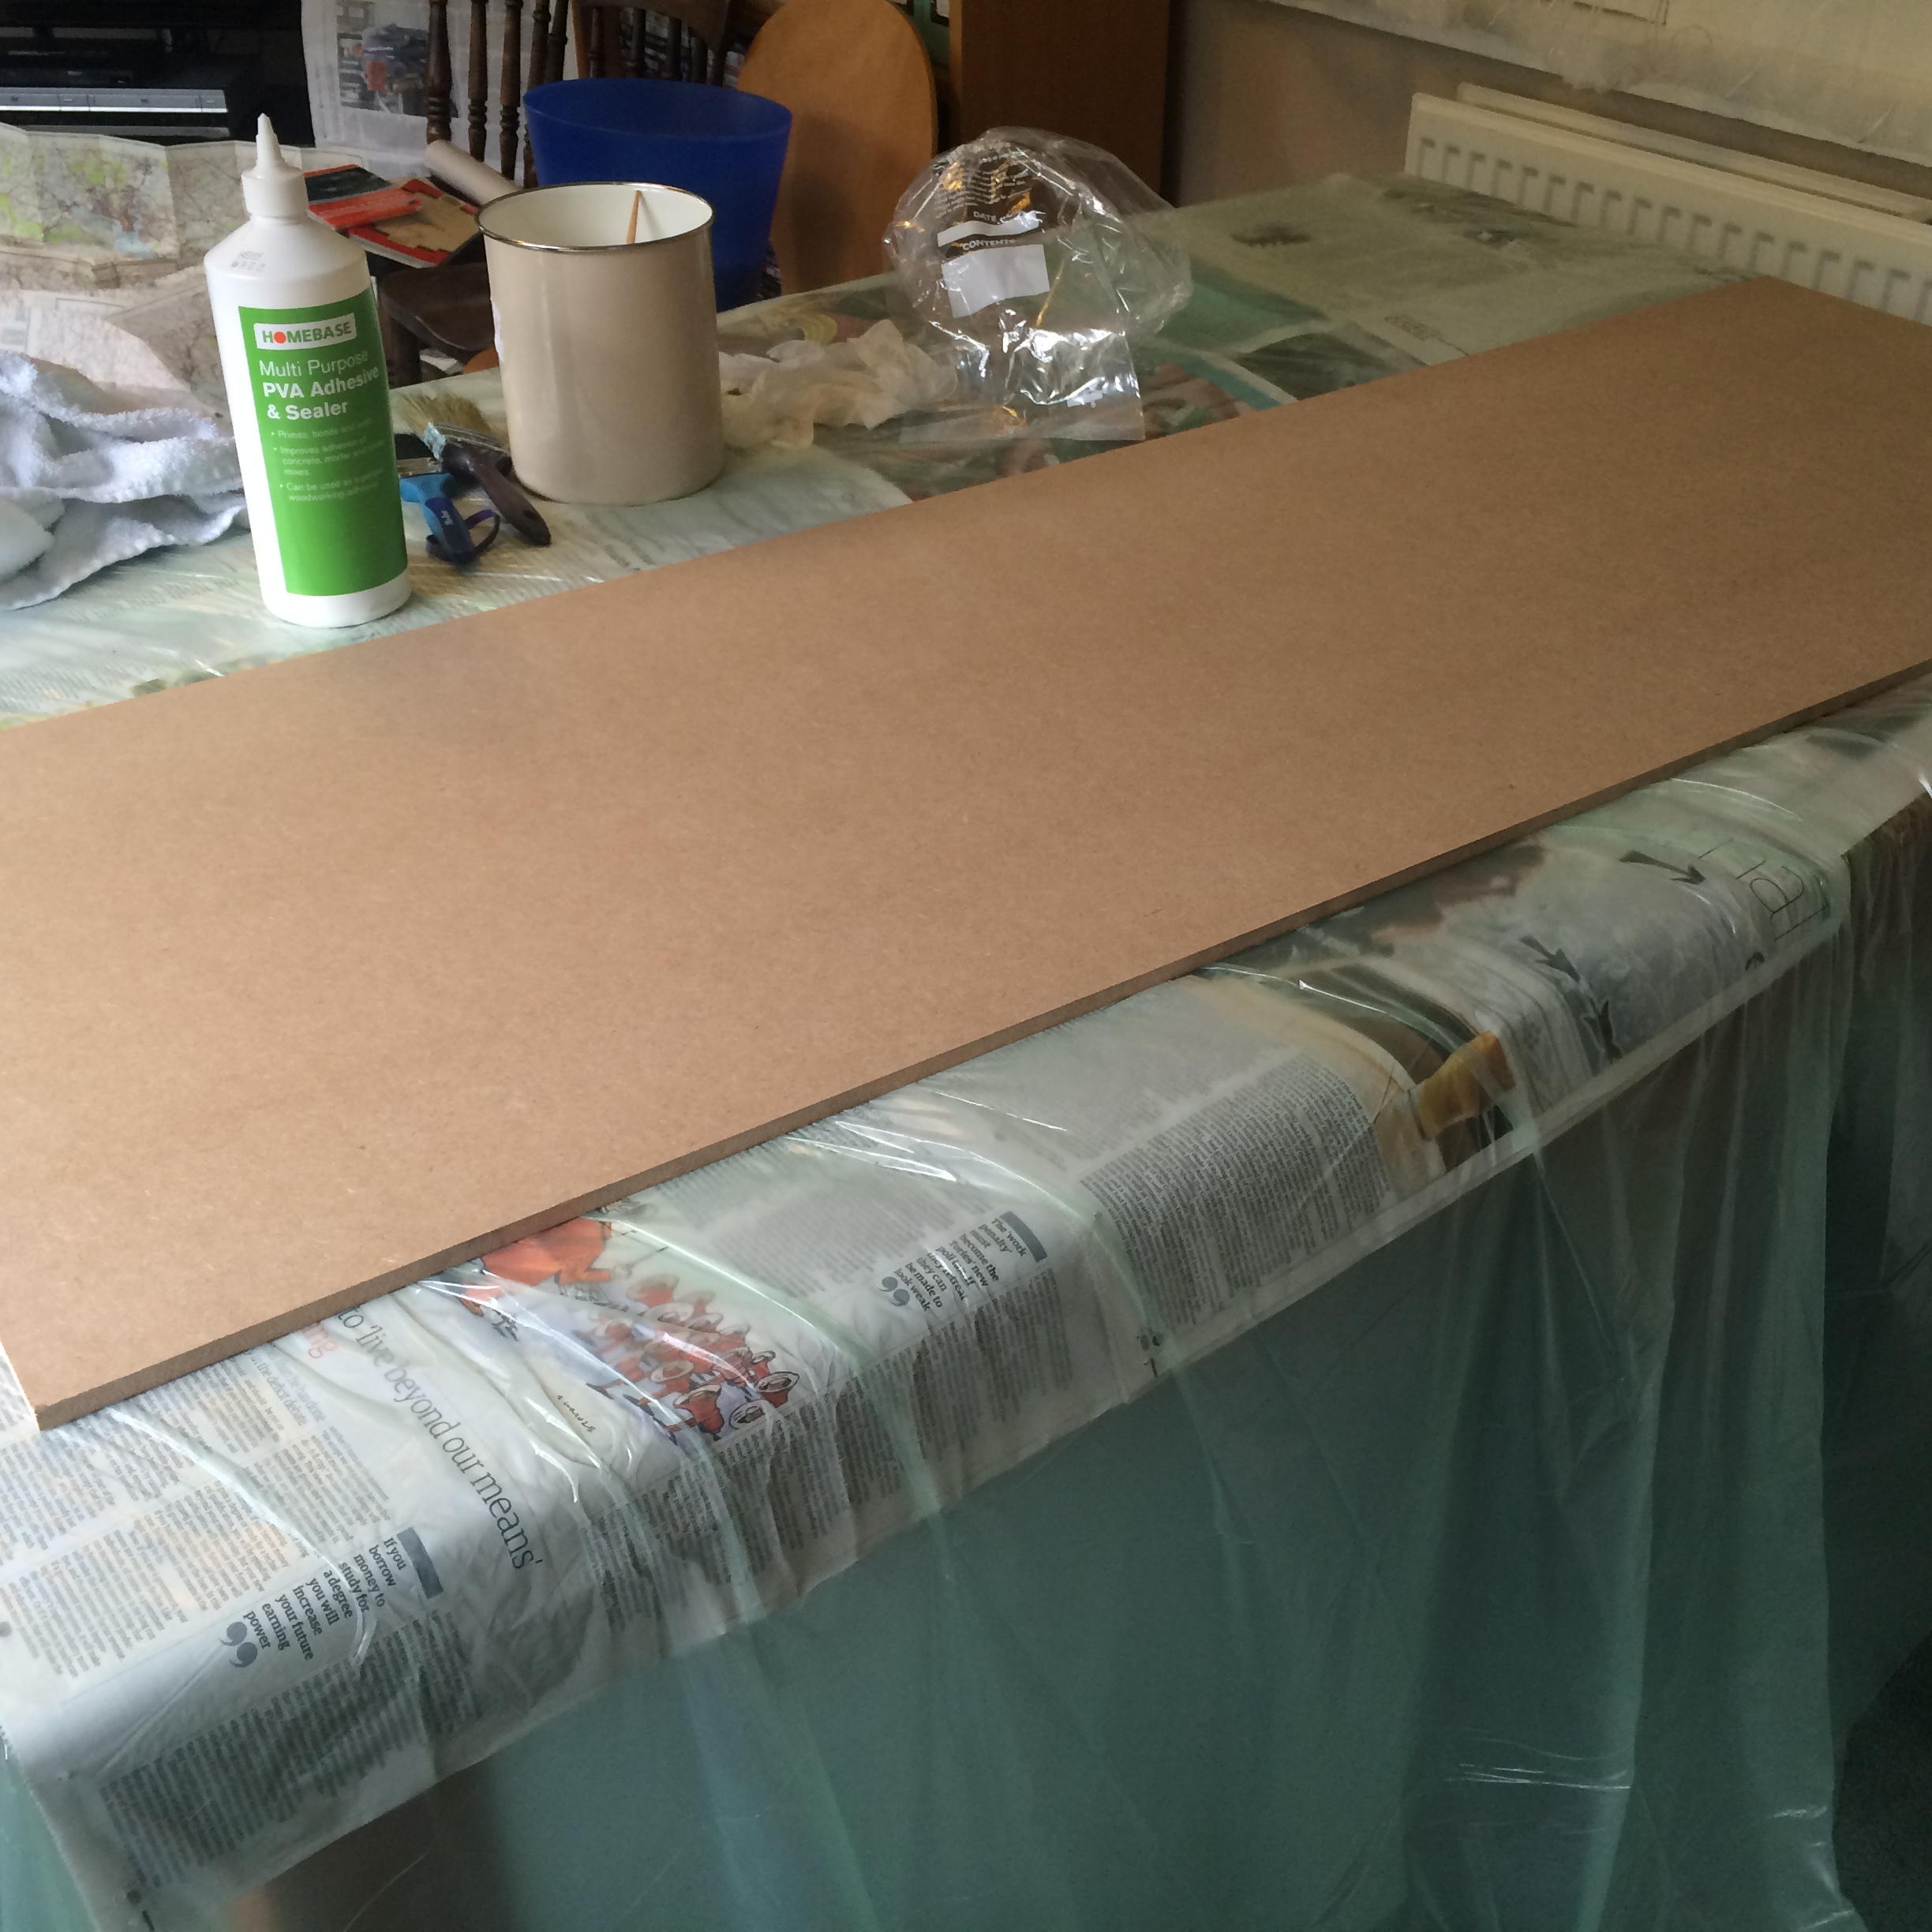
5 mdf boards, cut to size (width: 0.5m; height: 1.5m). The mdf needs to be thick enough so it doesn’t bend.
a lot of PVA glue (which I called UVA glue at my local paint shop, but the guy in there knows I am a bit of an idiot!)
maps from charity shops
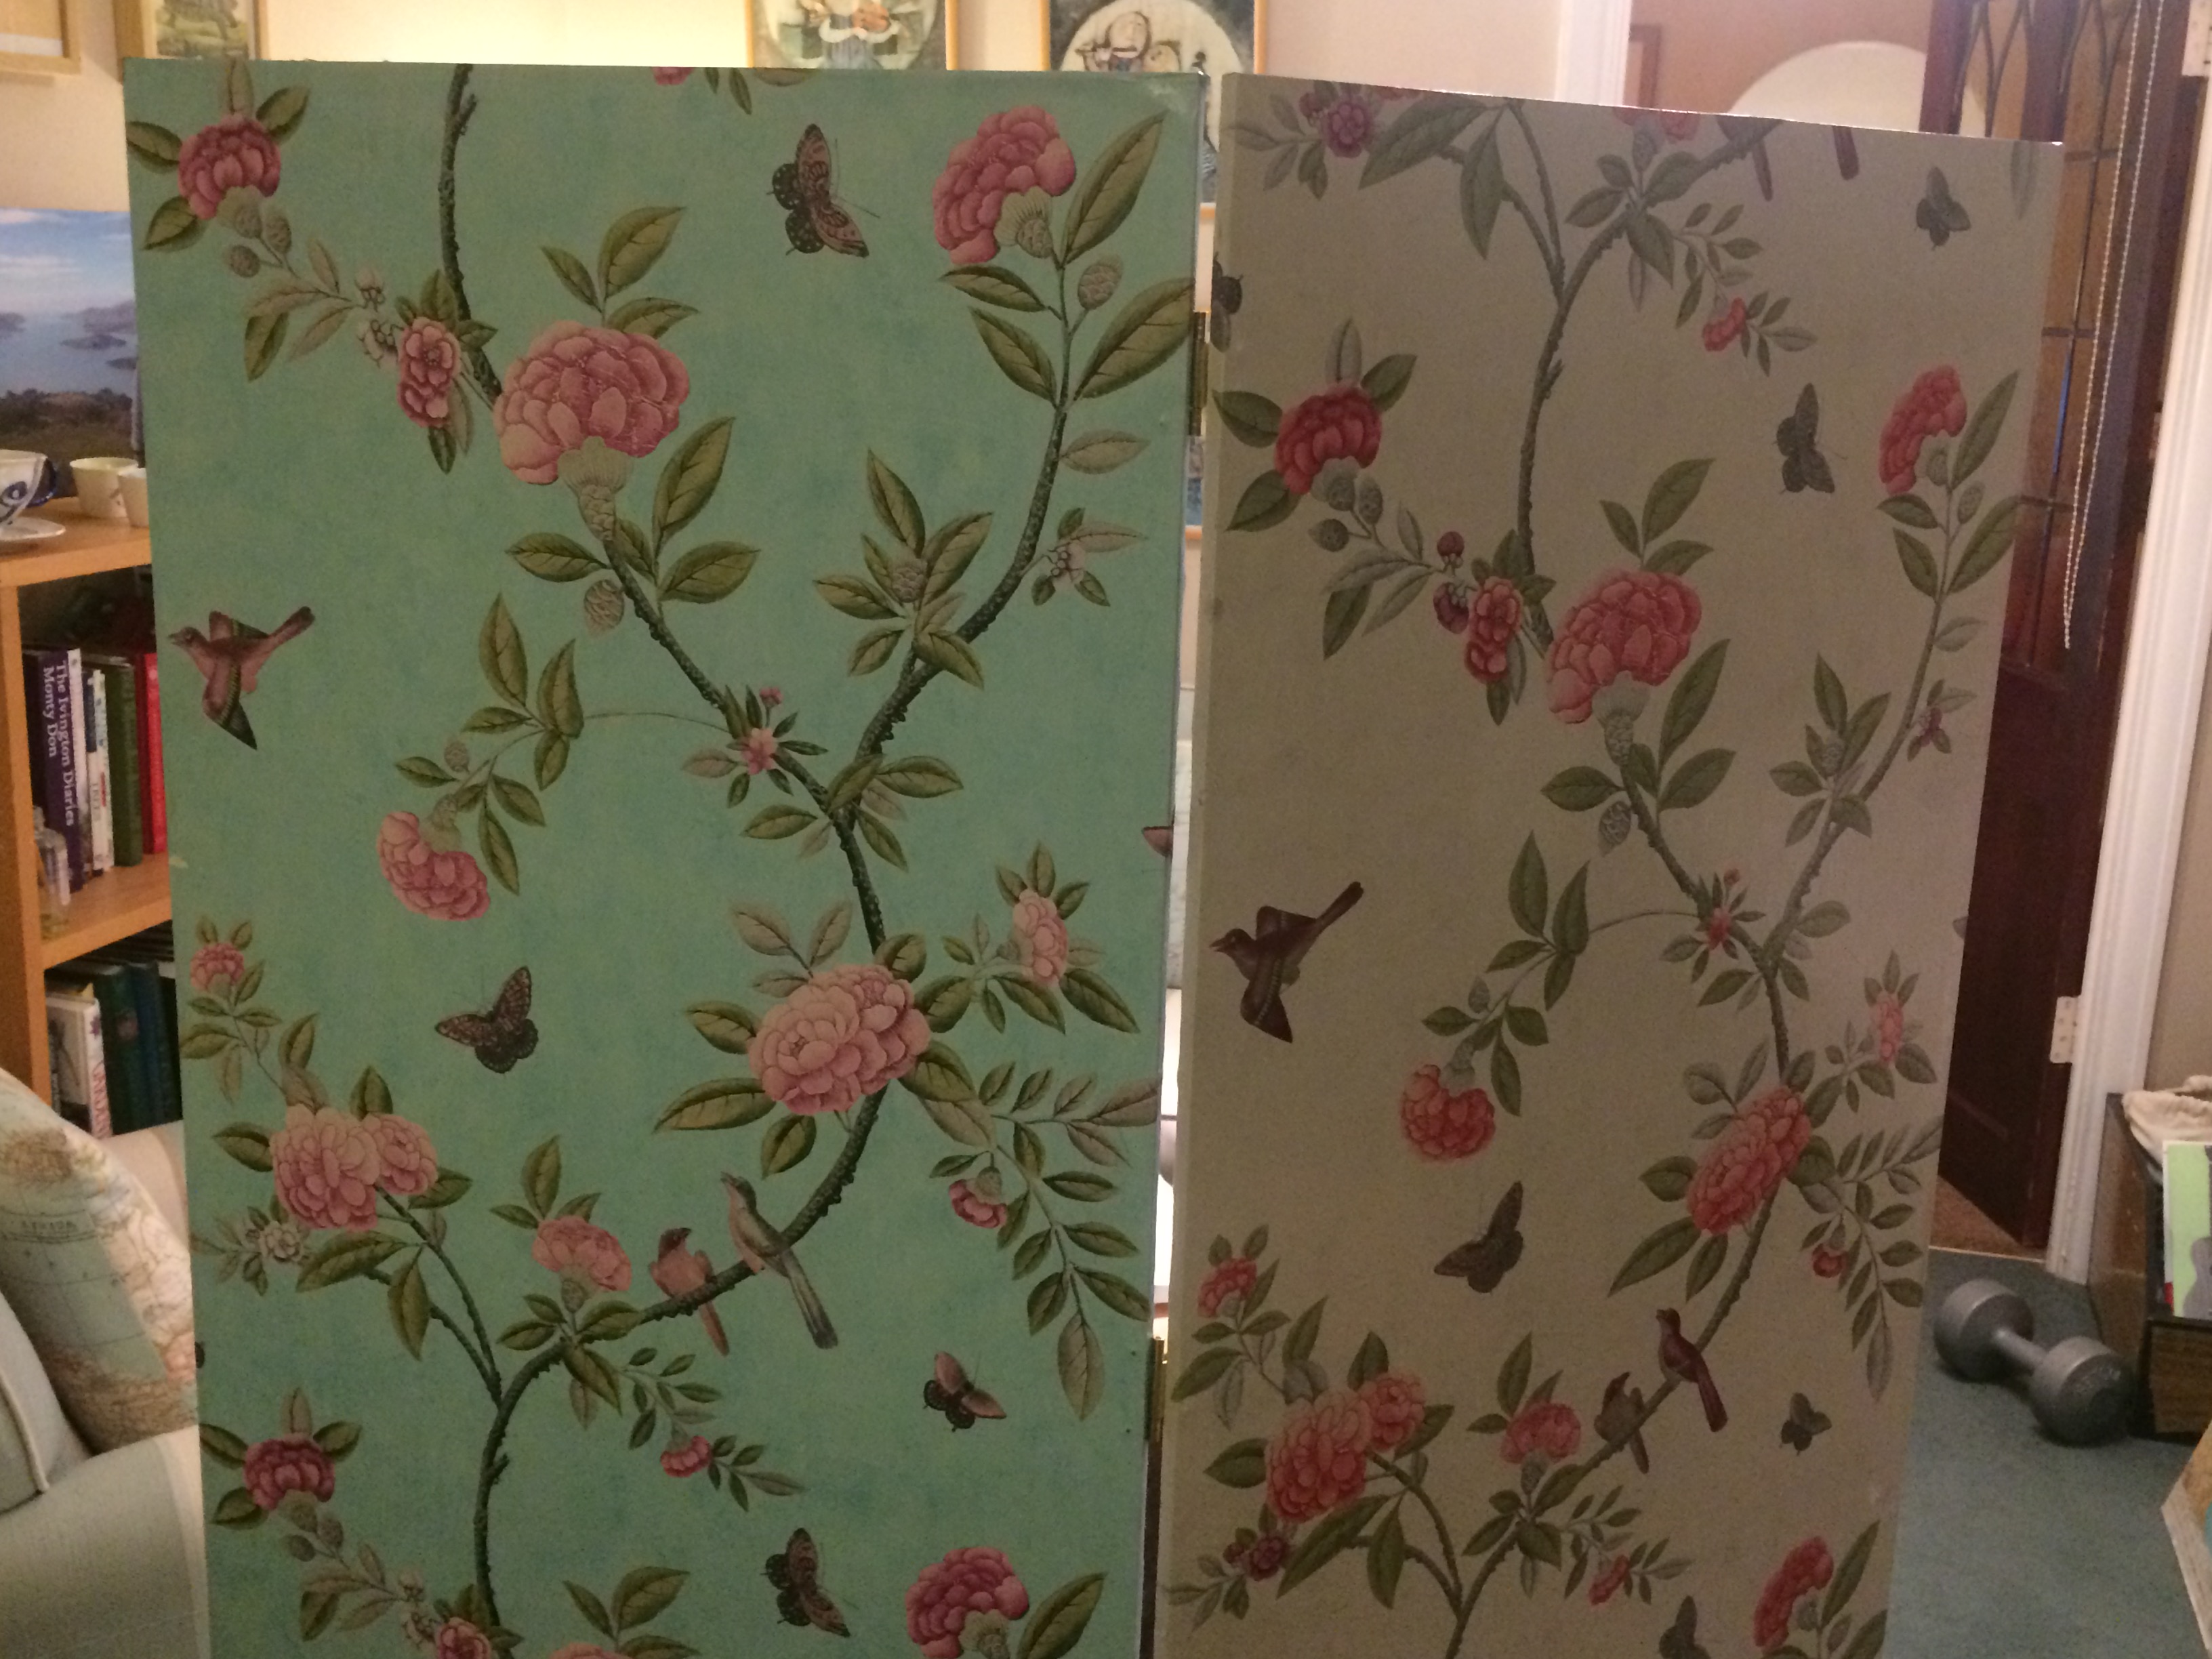
wallpaper (or alternatively you could try using material)
flush hinges
paint brushes and dust sheets
I also ended up using my staple gun, which was one of those slightly dangerous pieces of kit I already owned.
So the first step was to go to the timber merchants to buy the mdf. There are some pretty scary men working in those places, and you can just imagine how much charm this middle-class, middle-aged woman had to muster on a drizzly grey day at a lumber yard at the back-end of a rough industrial estate. Still, all’s well that ended well and I managed to conjure a smile of out of the old gnarled guy who cut it all to my spec, though it was very hard work. The initial conversation went a bit like this. Let’s call the gentleman – um, Unfriendly.
Me (smiling): “Hello. I need some mdf please”
Unfriendly: “Yes”
Me (still smiling): “Do you sell mdf?”
Unfriendly: “Yes”
Me (smile-free): “OK. And where might I find the mdf?”
Unfriendly: “In there”, pointing to a shed the size of a small primary school.
The cost for the boards was about £85; you could of course source panels from skips or maybe charity shops, and old, interesting doors could make a quirky and cost-effective folding screen too (there is a picture of one on the pinterest board).
We all know that preparation is key, so I got everything organised, threw dust sheets over anything that could get unwanted glue on it, made a cup of tea and brought in my first sheet of mdf.
My plan was that one side of the 5 screens would be covered in vintage maps, and for the other sides I chose some pretty wallpaper. Firstly, you have to coat the mdf with a layer of PVA glue, to seal it. While that was drying I started cutting out bits of the maps ready to start the process of decoupage – ie gluing the cut out paper to the object.
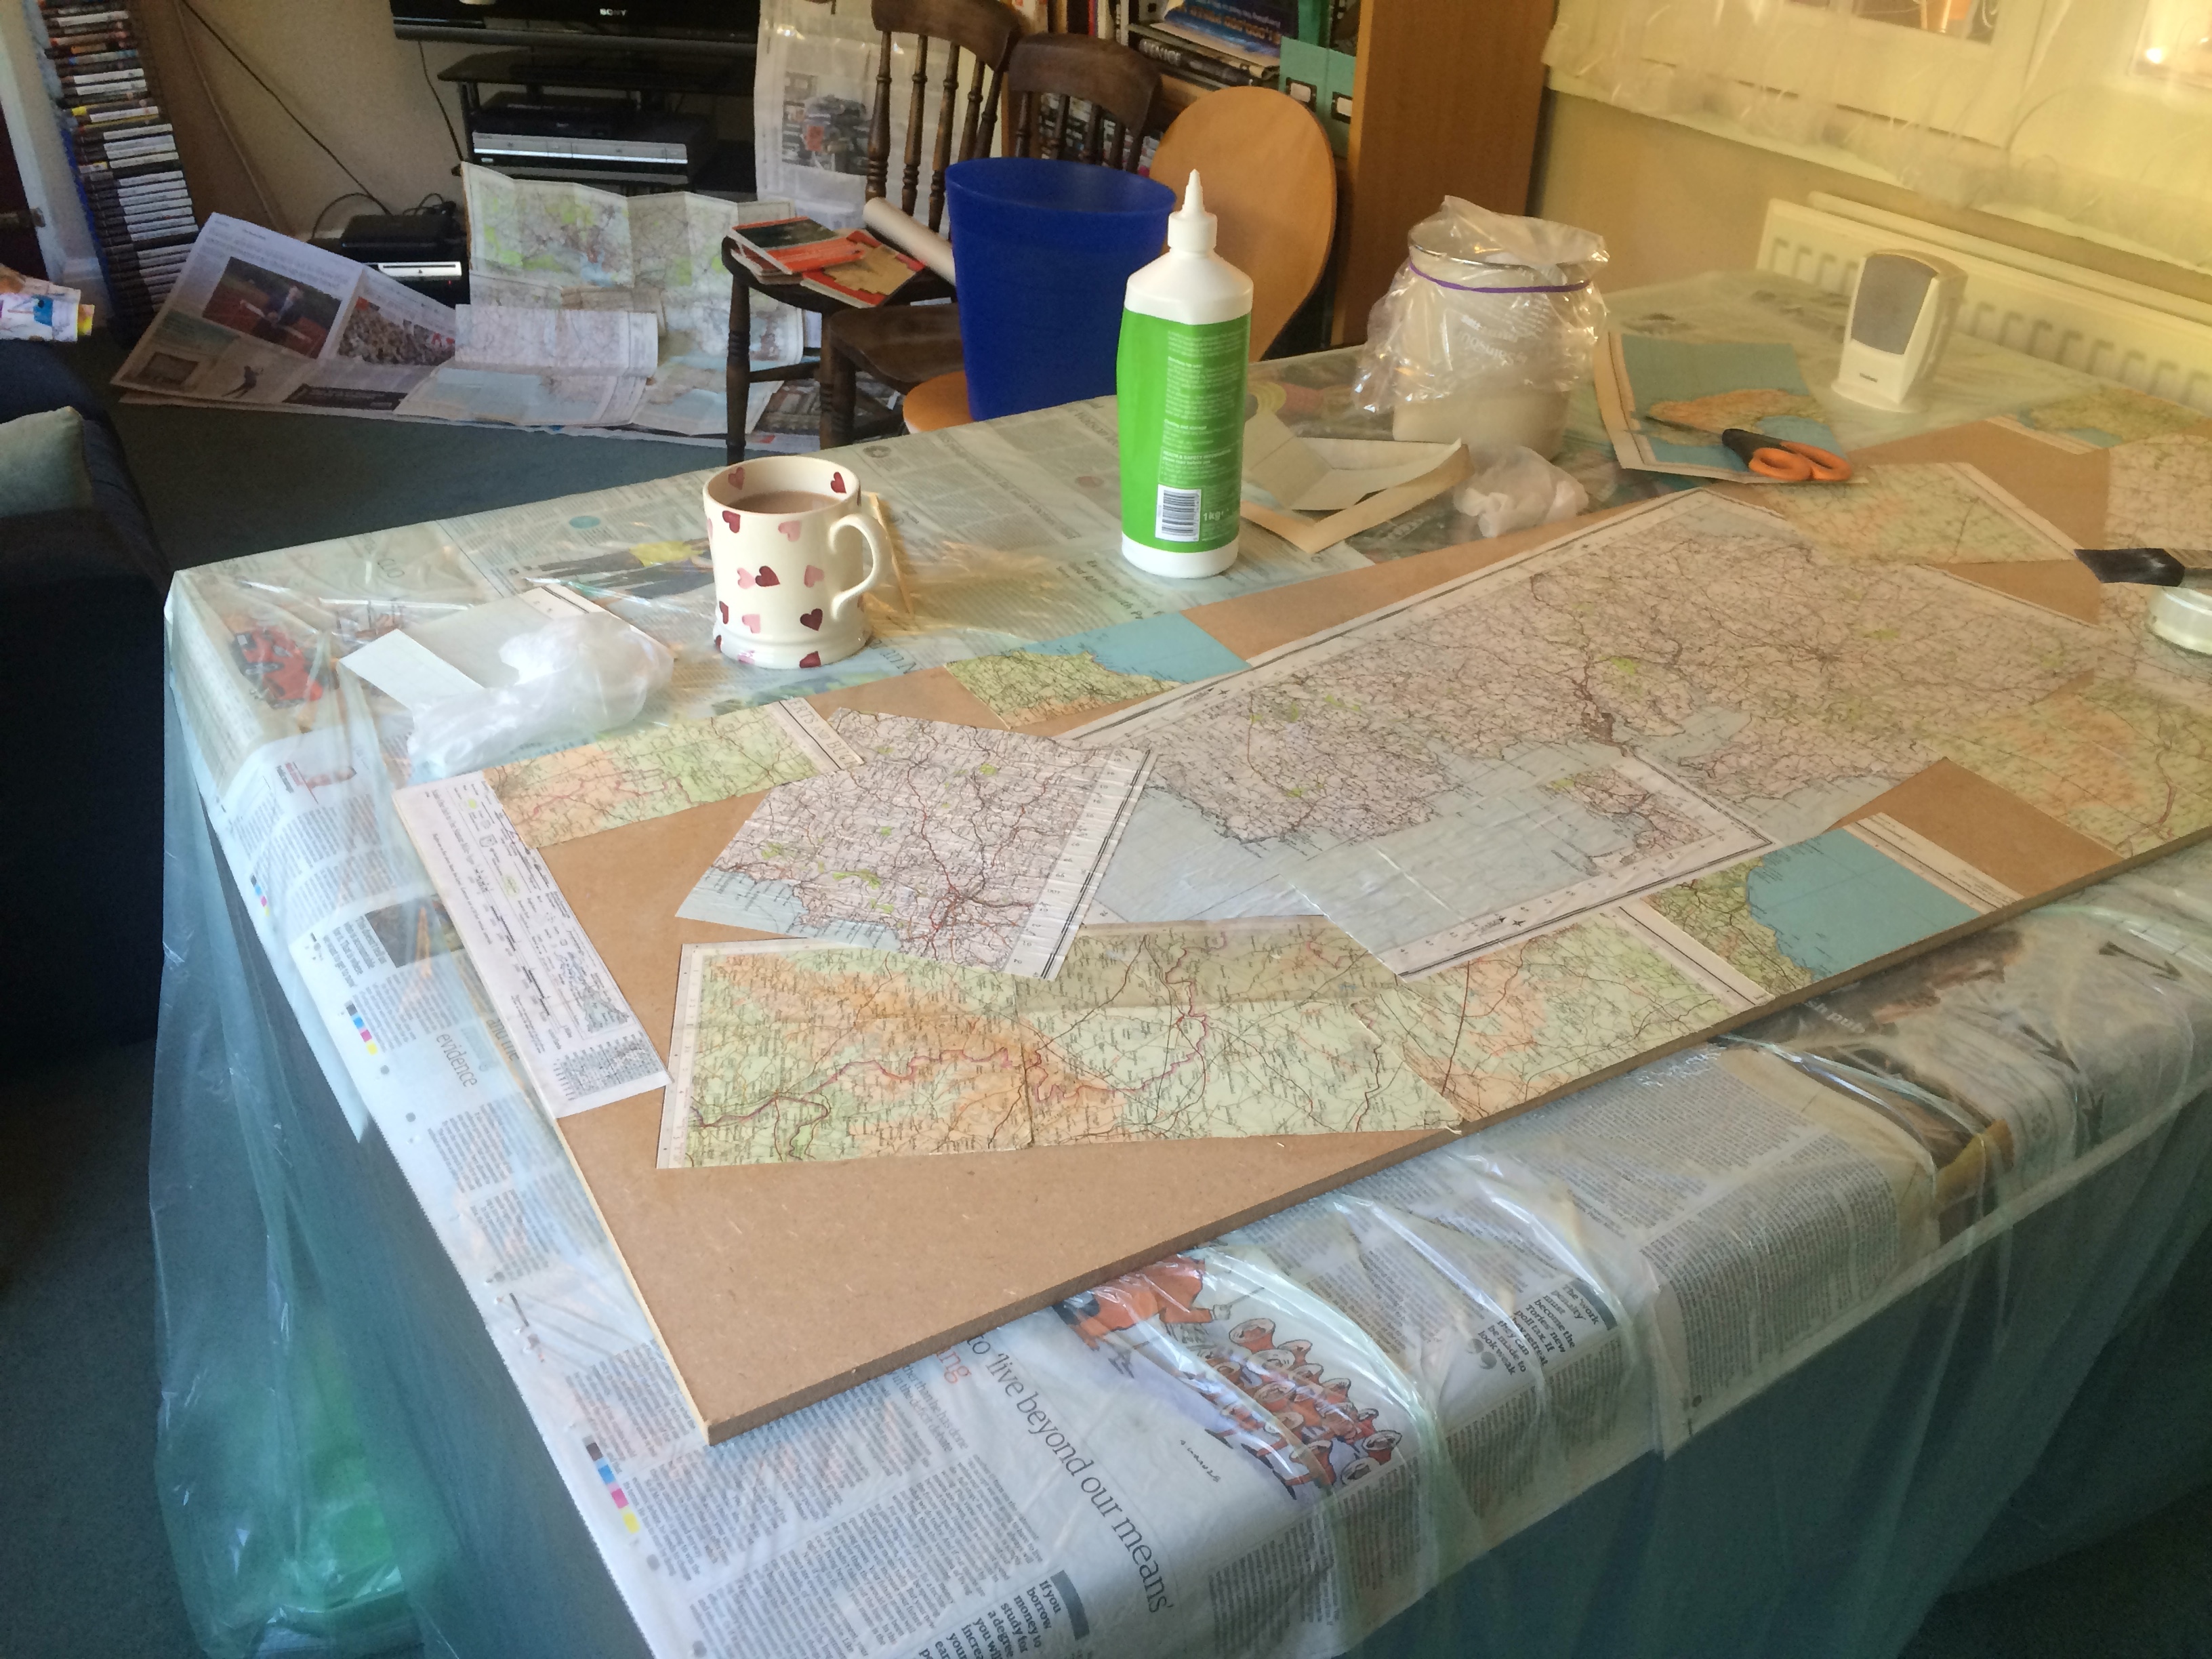
Once the maps have been glued into place, including the sides of the mdf, but not going over onto the back, and once it has all dried, you brush yet more glue over the top of the entire thing; 2-3 coats gives it a nice shine and (like varnish) will stop it from being too knocked about. Repeat times 5, then flip the panels over, seal the mdf and start gluing the wallpaper on. I asked my local paint-shop guy whether I should use wallpaper paste, but he said the PVA would be fine. He was right. By complete fluke, the rolls of wallpaper were within a few millimetres of being exactly the right size for the panels. If you are going to use wallpaper, this is definitely worth bearing in mind.
 Getting the wallpaper and maps to stick to the 1cm thick edges of the panels was a bit tricky and I did end up using my staple gun.
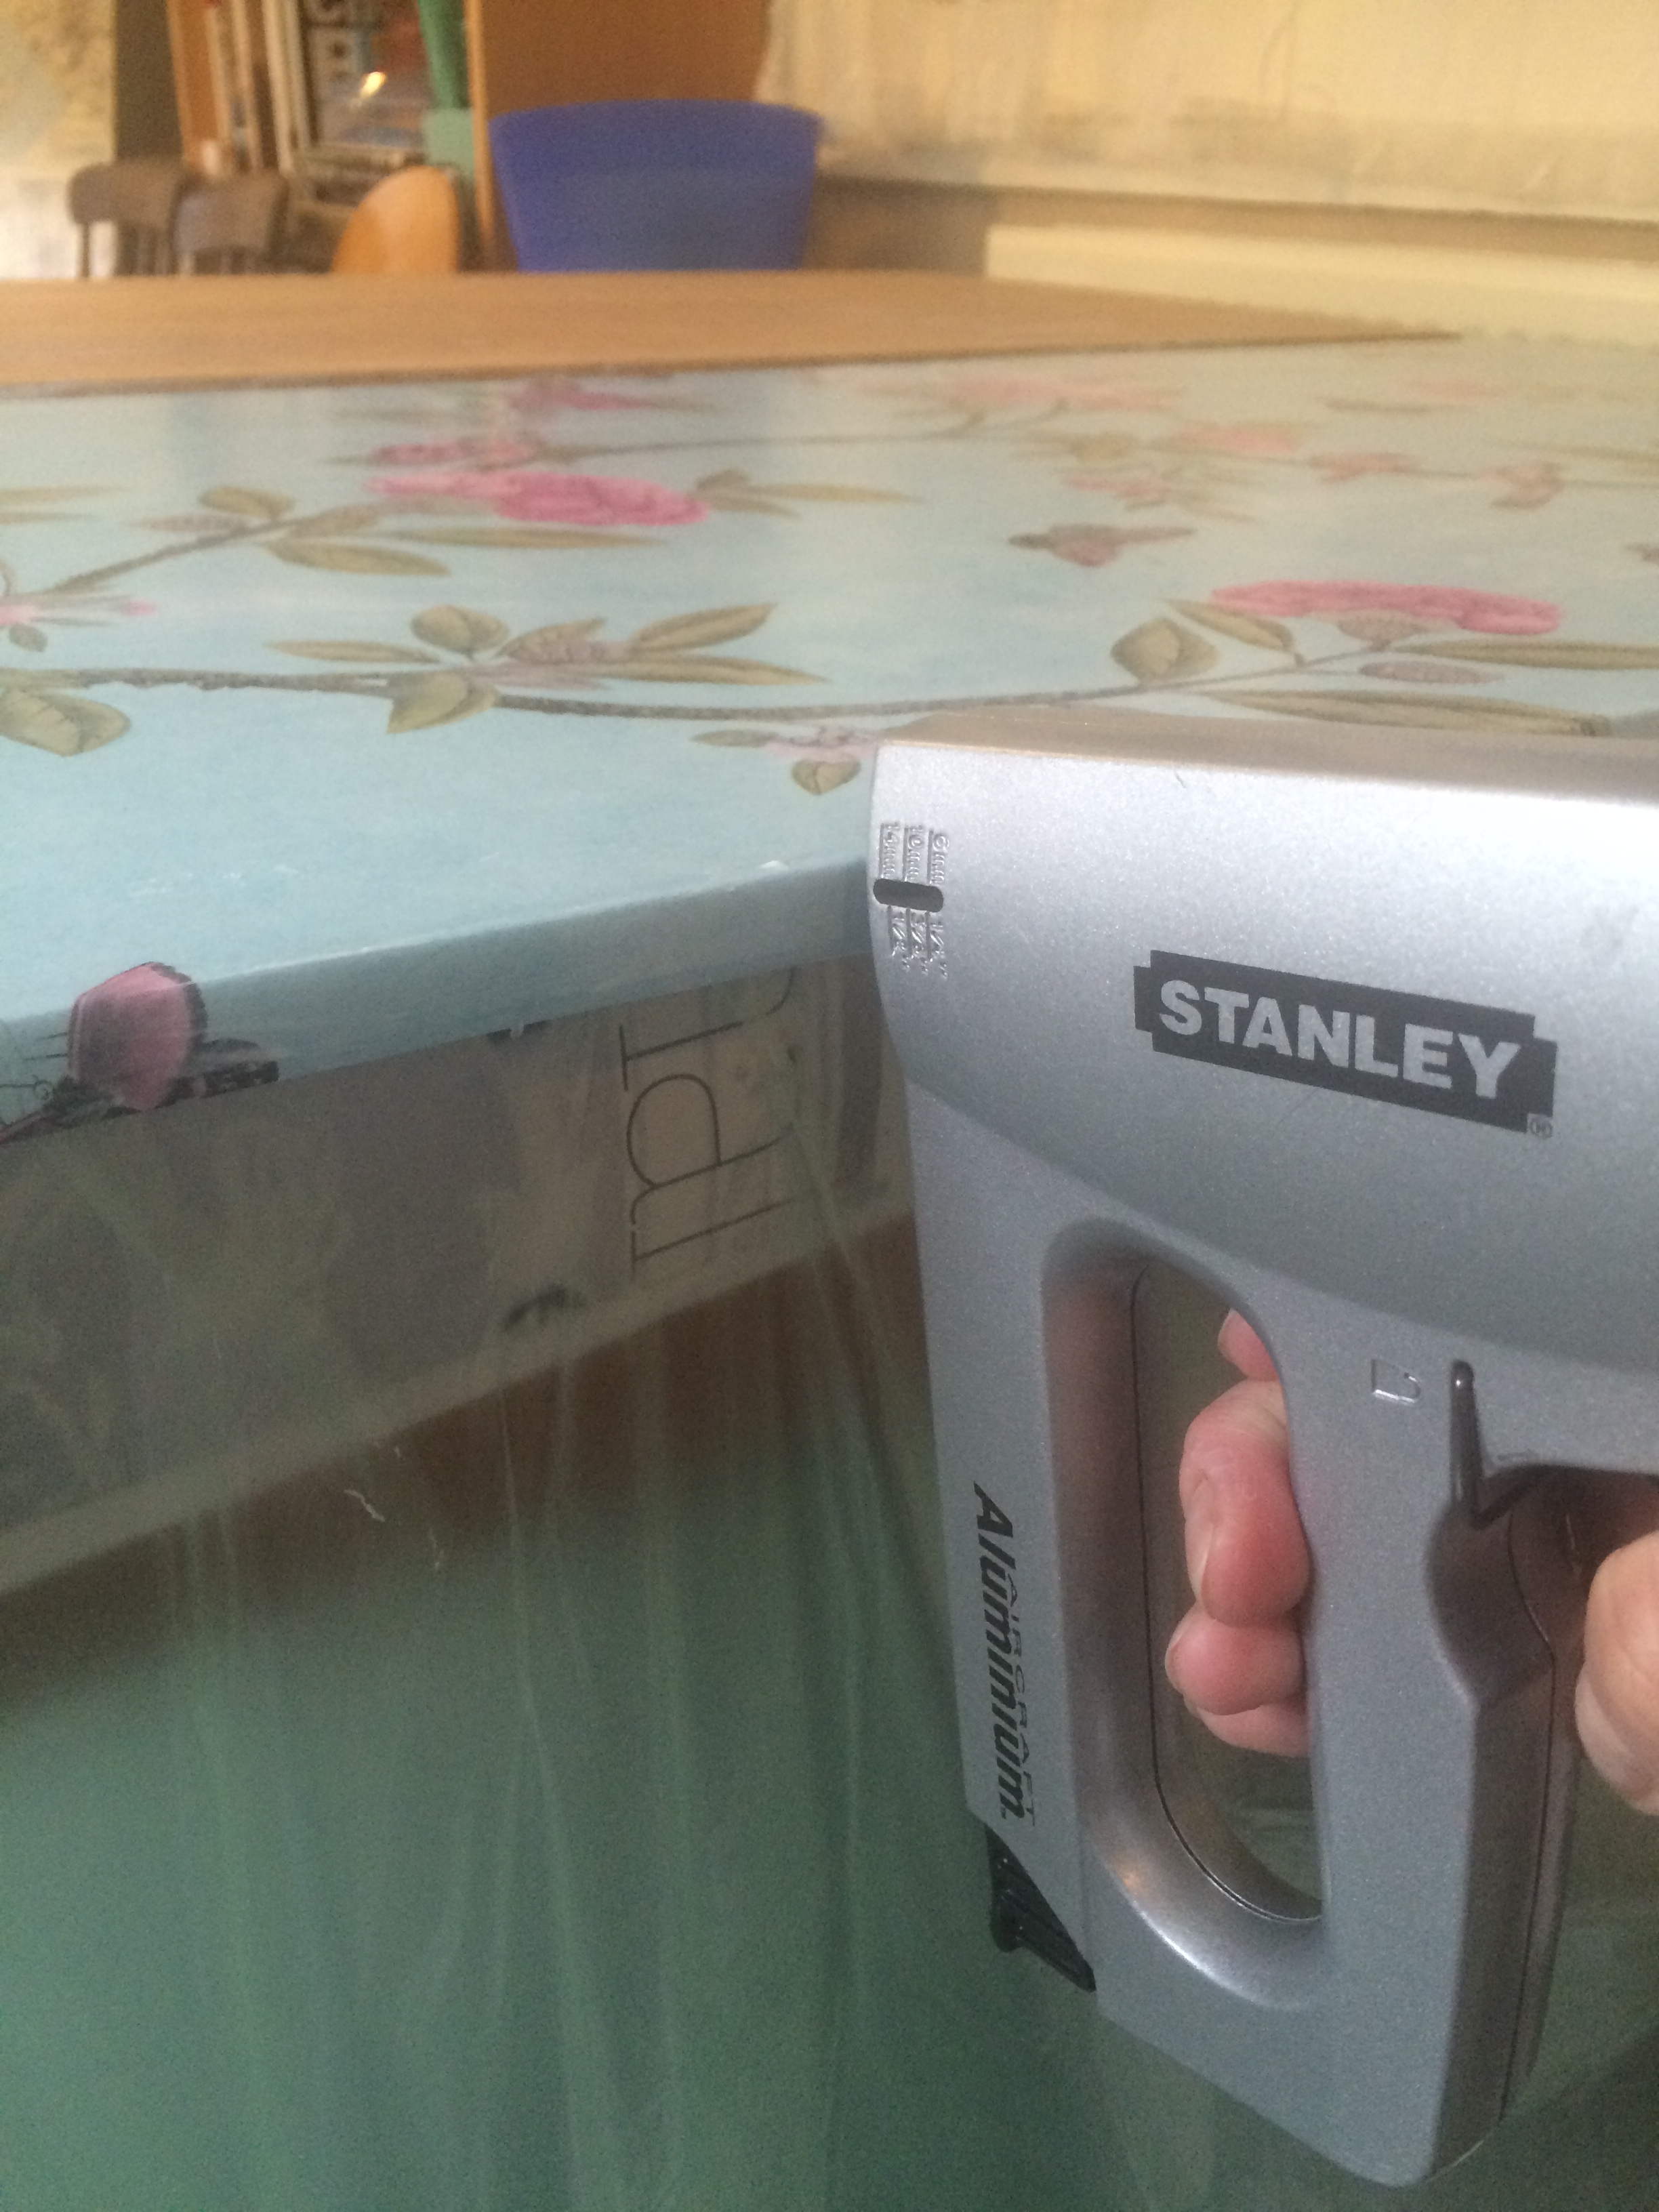
I decided to use flush hinges and found the best value was from Screwfix, where I got 20 of them for about £8.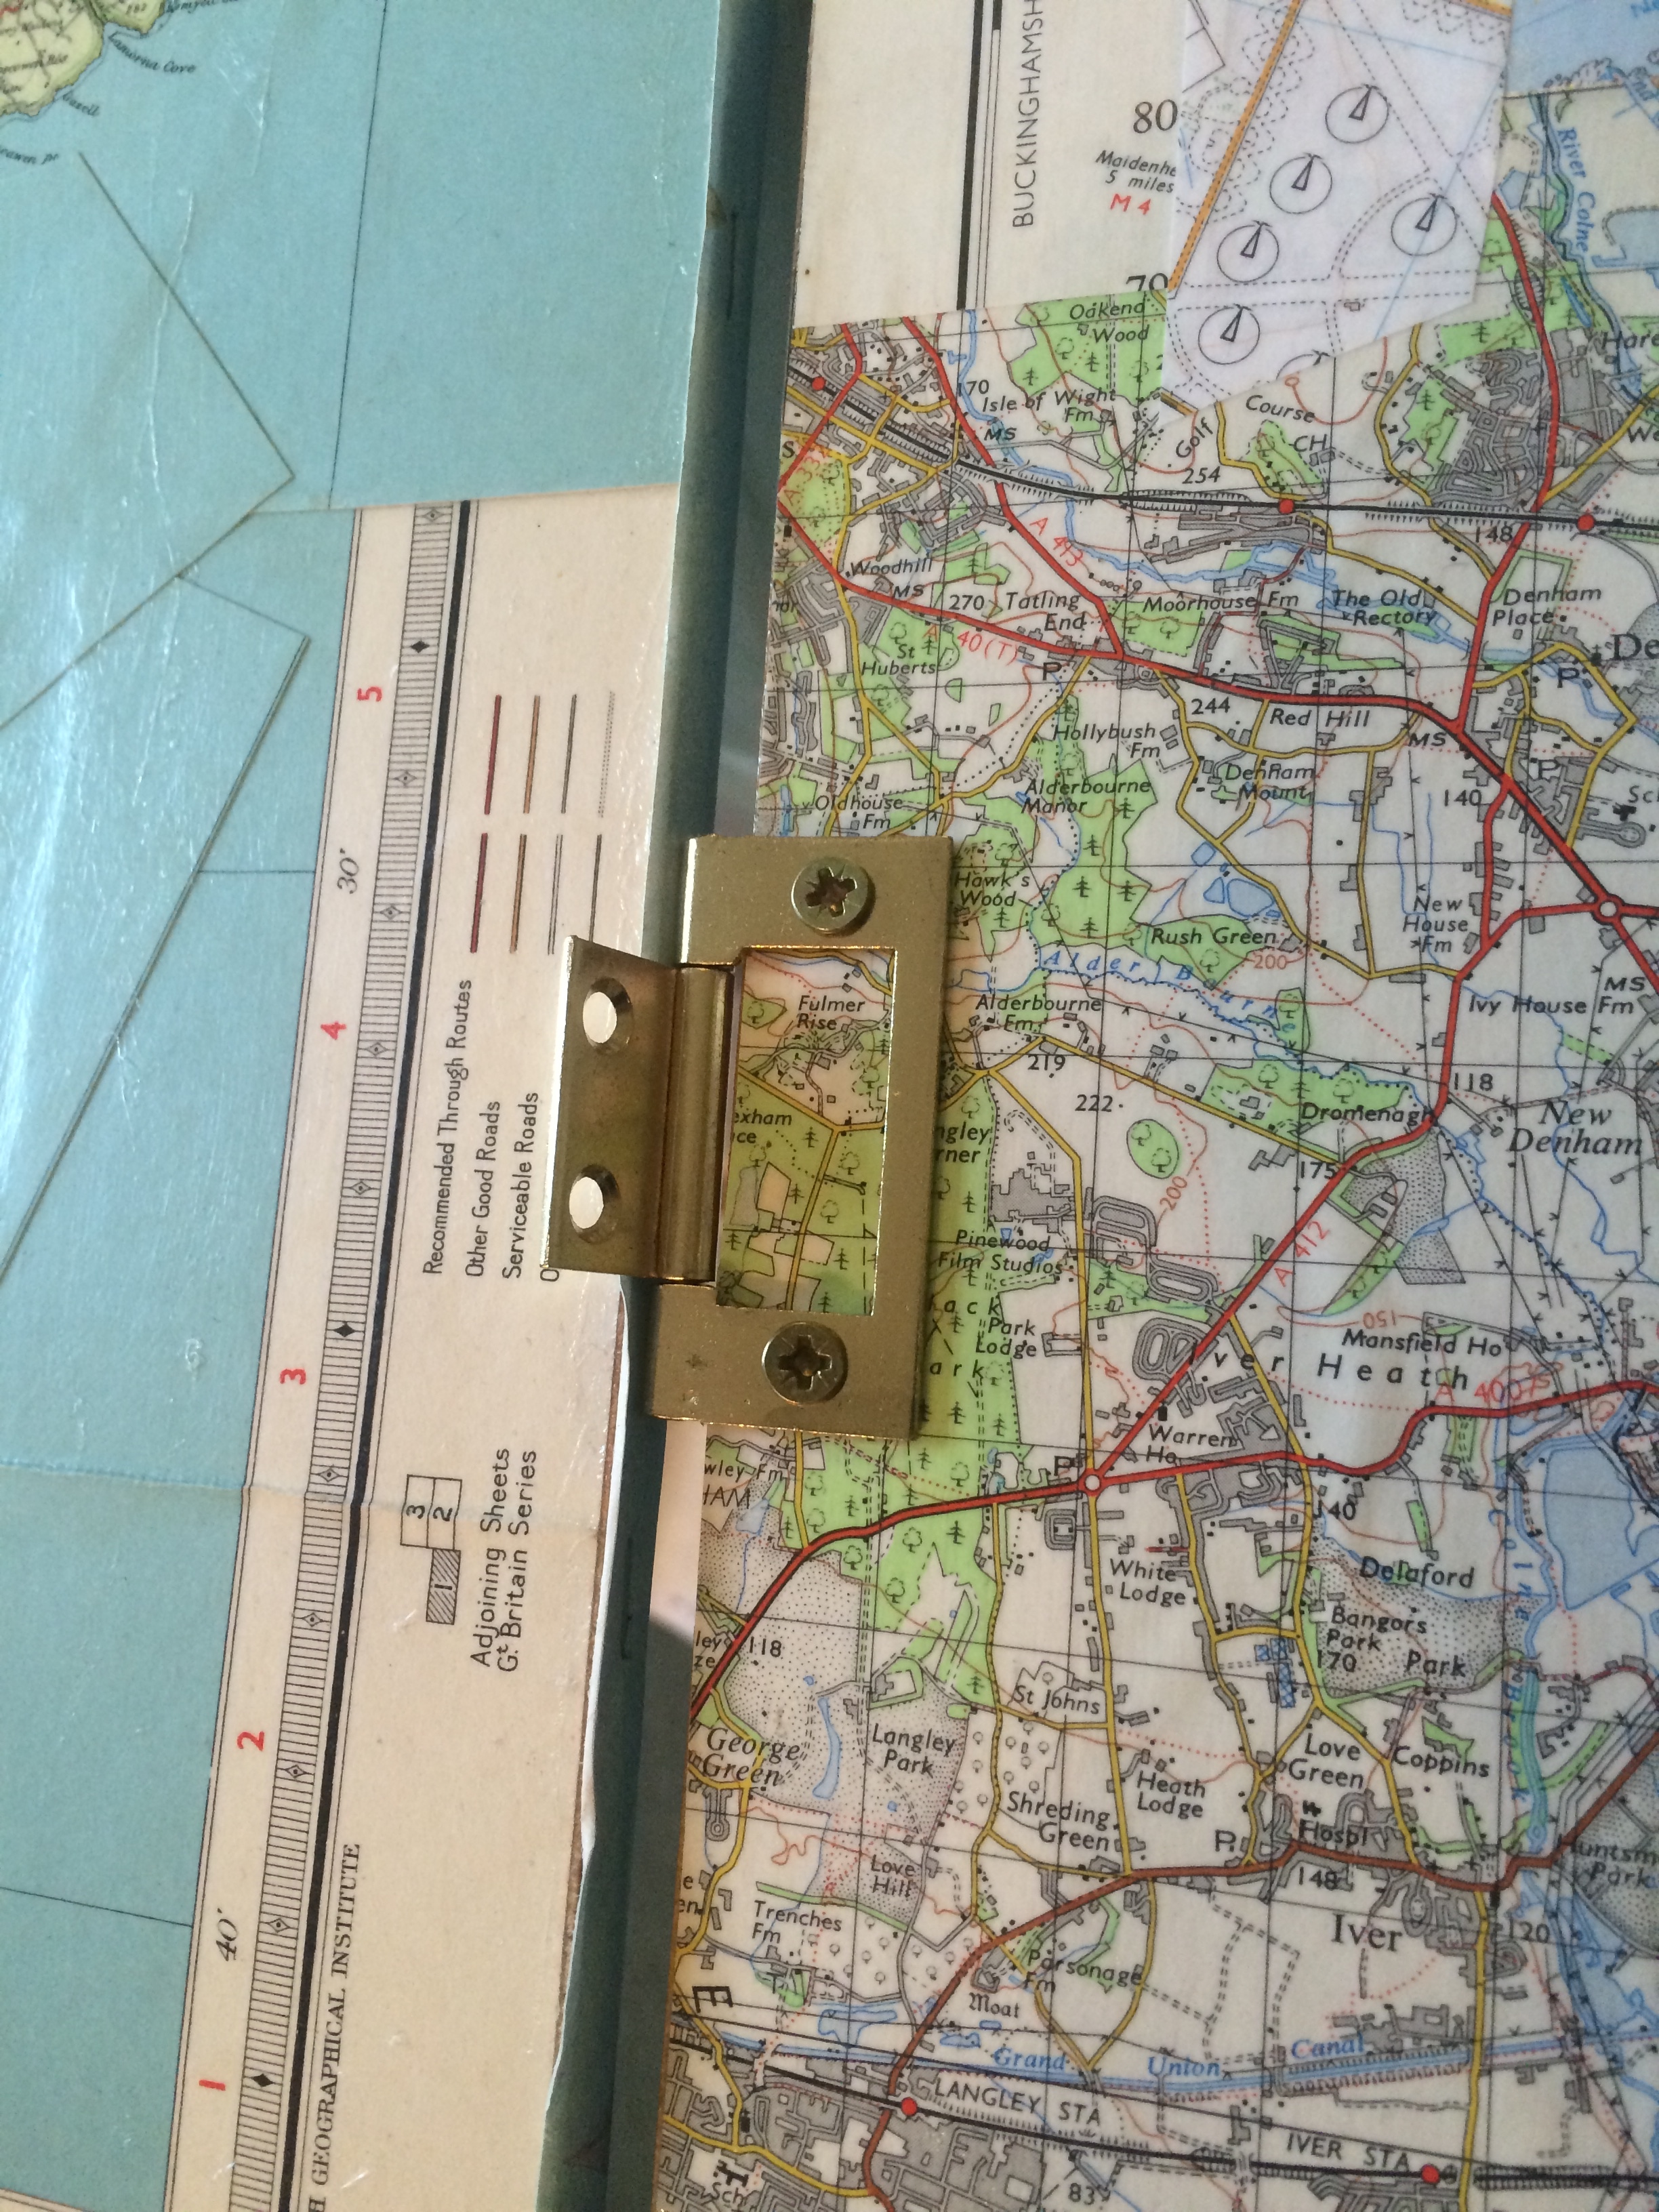
That meant I could put 4 (or indeed 5 if I wished) per panel. Now this was the point at which I made a fundamental error: in my joy at having got that far with no mishaps, and my impatience and lack of logic, I screwed all the hinges to the same sides of all 5 panels. Any old fool knows that they need to be alternate.
So hopefully that all makes sense. The end result, once I got the hinges right looks like this:
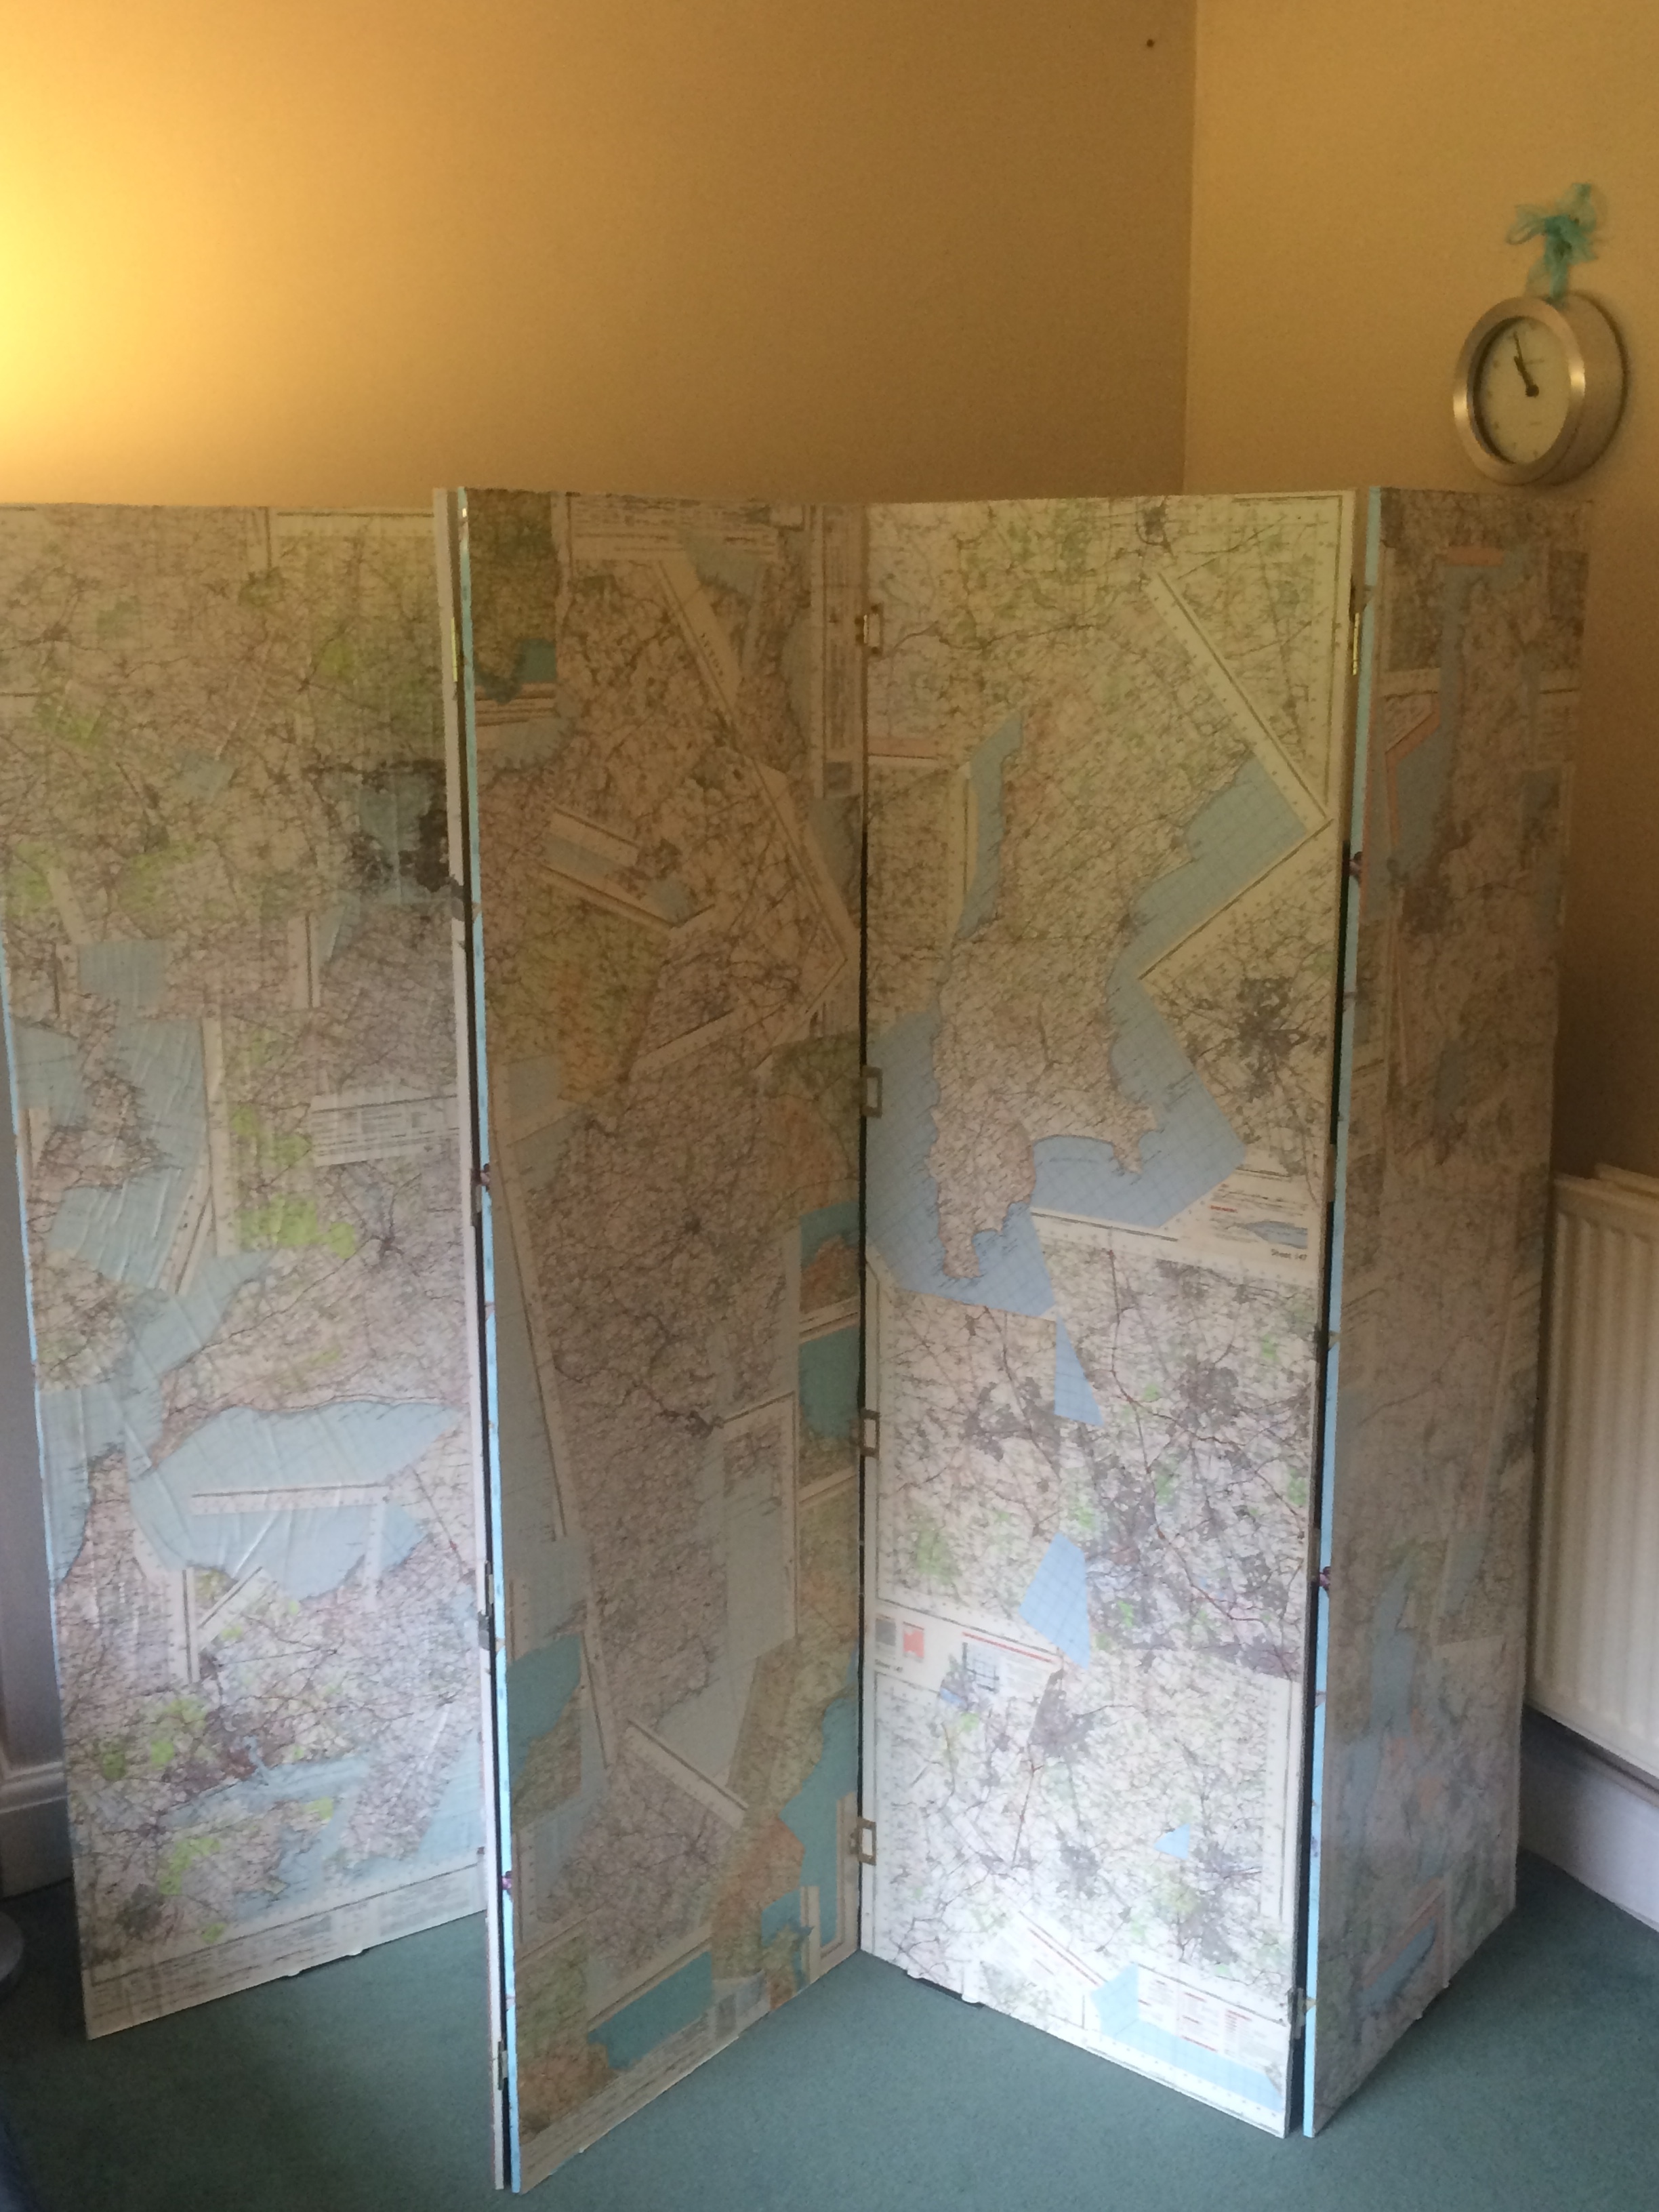

It is quite heavy and the whole lot did topple over onto me while I was screwing on the hinges (which is fiddly without a helper) but my scream did not go unnoticed and I survived to tell the tale.
Total cost, bearing in mind I chose to buy 2 different rolls of wallpaper at £20 each (so have plenty left over for other projects) was about £140. I could definitely have done it cheaper, but for a first shot, I am very pleased and it does the job of hiding the TV. It is also rather bigger than I needed. Four panels would have sufficed. So the last piece of advice is, don’t guess what the size should be and cross your fingers like I did!
Annie Bee x

